|
How to Use Workoutz.com Exercise Videos In Classroom Presentations The following tutorial explains how to incorporate workoutz.com exercise videos into classroom presentations using PowerPoint 2013
Locate the exercise video
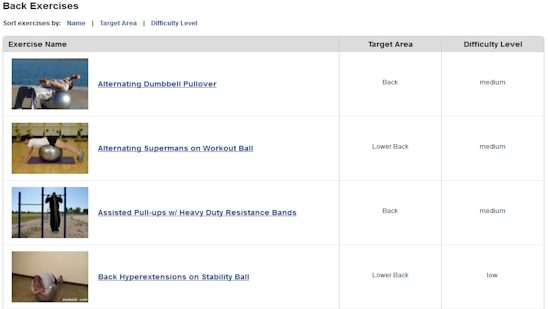
First, use the exercise directory to locate the video you wish to incorporate into your presentation. Click on the appropriate link within the directory to view the exercise.
Locate the menu bar
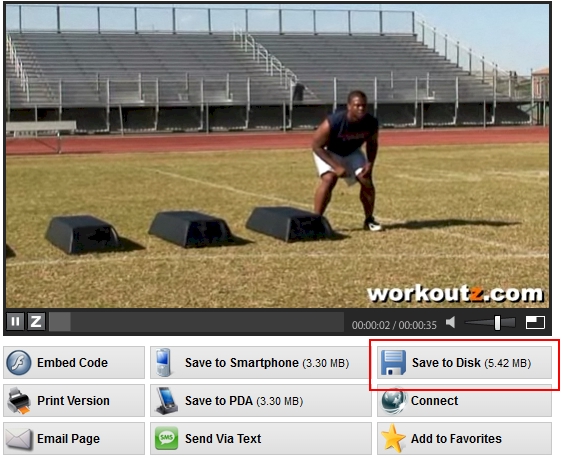
Locate the workoutz.com video player. Below it you will find a widget menu with several options (shown below). Once there, locate the "Save to Disk" link.
Download the file
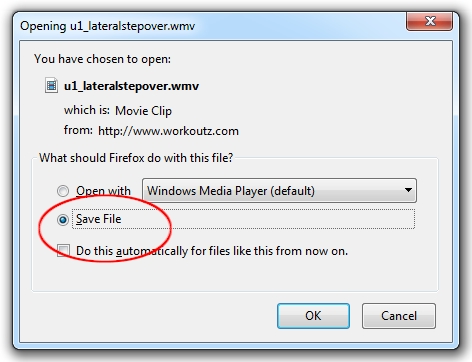
Click on the "Save to Disk" link. A dialogue box will appear with options. Choose the "Save" option to store the video file onto your hard drive. Be sure to note the location of the saved file. You can rename the video file once it is saved.
Open PowerPoint. On the menu bar, click the following path:
Insert Tab > Video > Video on My PC
Video icon is located on the far right side of insert tab. Select "Video on My PC." You will have the option to navigate to where the video file was saved on your hard drive.
Once you have located the video from your hard drive, select "Insert." The video should now appear on the PowerPoint presentation
To select auto or manual playback options, do the following: - Left click anywhere on the embedded video - In the menu bar, locate the Playback tab
- Choose any playback option: On Click or Automatically On Click - The video must be clicked to play/start Automatically - The video automatically starts when you arrive at the slide containing the video
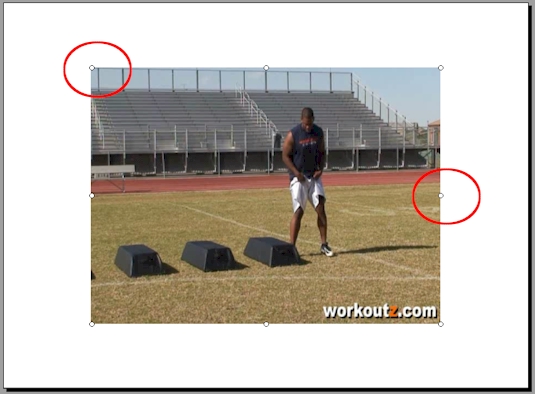
Drag the video frame to any desired location on your PowerPoint slide. You may have to resize the video (Note: Workoutz.com videos are widescreen format by default). To do this, click on the video once then select one of the eight small circles located around the video. Drag/Resize them to the desired dimensions.
The computer from which you are presenting must contain both the original video file and the PowerPoint file. For best results, we suggest downloading the files to a zip/flash drive. Alternatively, you can forward ALL FILES (all powerpoint and video files embedded into your presentation) to an email account and then download the files to the desktop of the computer from which you are presenting. This video integration method works best because it does not require an internet connection. IMPORTANT: All testing should be done on the actual "presentation" computer to ensure proper playback. To test your video in a live slideshow presentation, locate the menu bar, then click the following path: Slide Show tab > From Beginning |